You know it’s time to replace wheel bearing when you hear humming, squealing, or clicking sounds while driving. Here’s what you need to do: remove the wheel, change the old bearing, pack the new one with grease, and install it. Always grab gloves and safety glasses before starting. If you ignore symptoms like steering vibration or uneven tire wear, you risk losing control or even having a wheel detach.
Humming noise that changes with steering
Squealing or growling sound at higher speeds
Clicking or popping sounds during turns
Key Takeaways
Listen for sounds that show a bad wheel bearing, like humming or squealing. Fixing these problems early can stop big safety issues.
Get all the tools and safety gear you need before you begin. Being ready makes the replacement easier and safer.
Use the right steps to take out and put in wheel bearings. Doing it the correct way keeps your car safe and working well.
Tools and Safety
Tools Needed
Before you start, gather all the tools you need. Having everything ready makes the job smoother and safer. Here’s what you should have on hand:
You might need a jack and jack stands to lift your vehicle. Always check your owner’s manual for any special tools your car might require. If you’re working on trailer bearings, a plastic bag can help pack grease without making a mess.
Tip: When you remove old bearings, think about the environment. Stainless steel bearings can be recycled, which helps reduce waste. Ceramic bearings need to go to a landfill, so try to recycle whenever possible.
Safety Gear
Safety comes first. You want to protect yourself from sharp edges, flying debris, and grease. Make sure you have:
Don’t skip these items. Gloves keep your hands safe from cuts and chemicals. Safety glasses shield your eyes from metal shavings and dust. Closed-toe shoes protect your feet if you drop a tool.
Note: If your wheel bearings fail early and you haven’t damaged them, your warranty might cover the repair. Dealerships often honor warranty claims if you report humming or noise issues right away.
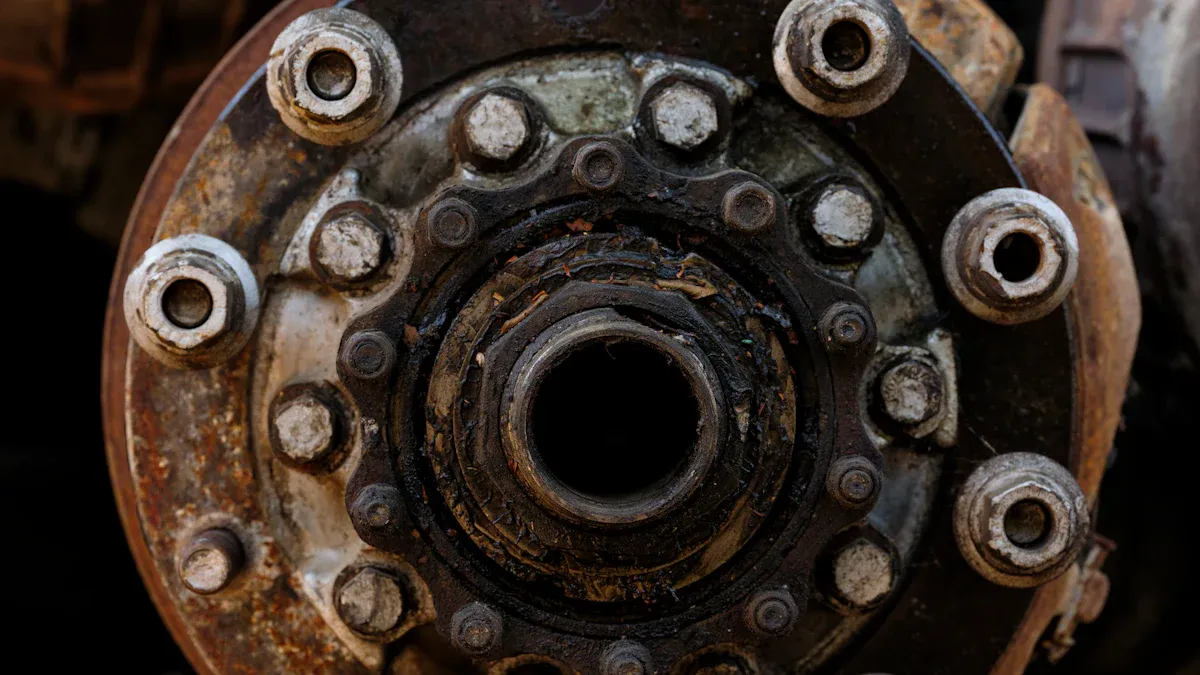
Replace Wheel Bearing
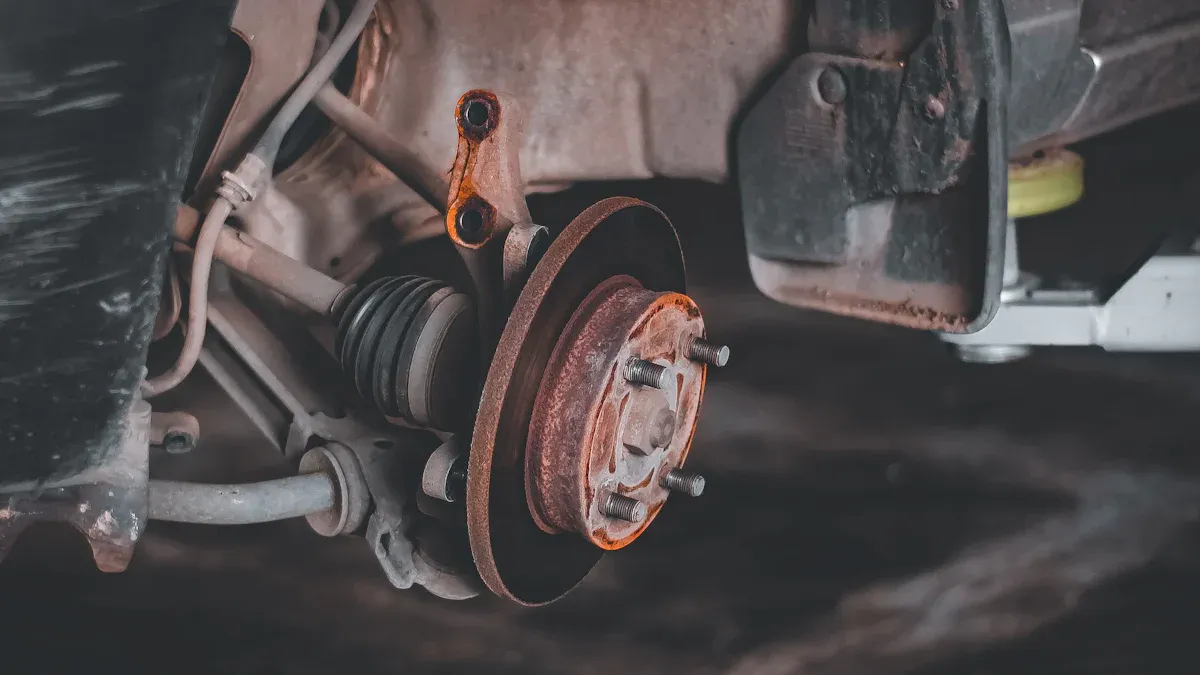
Remove Wheel and Components
Ready to get started? First, make sure your car is parked on a flat surface. Engage the hand brake and block the wheels with bricks or chocks. This keeps your vehicle from moving while you work. Use a floor jack to lift the car and secure it with jack stands. Always check your owner's manual for the right lift points.
Here’s how you remove the old wheel bearings and related parts:
Loosen the lug nuts on the wheel, but don’t take them off yet.
Lift the vehicle with your jack and place it on jack stands.
Unscrew the lug nuts and take off the wheel.
Remove the brake caliper. You might need a wrench for this step.
Take off the dust cover, cotter pin, and castle nut.
Pull off the rotor.
Unscrew the hub bolts and remove the old hub.
Disassemble the hub assembly.
Remove the bearing races and clean the knuckle.
Tip: Compare the new bearing with the one you just removed. This helps you avoid installing the wrong part.
Some common challenges pop up during this process. If you use an impact wrench instead of a torque wrench, you might apply the wrong amount of force. That can cause the bearing to fail early. Always clean the axle shaft and wheel speed sensor before you install new parts. If you skip this, you could run into problems later.
Change Wheel Bearings
Now you’re ready to change wheel bearings. Most passenger vehicles use ball bearings or tapered roller bearings. Ball bearings work well for everyday cars, while tapered roller bearings are great for SUVs and sports cars.
Follow these steps for how to change wheel bearings:
Gather your materials, including bearing grease, safety glasses, and a floor jack.
Remove the outer wheel bearing by prying off the dust cap and taking out the cotter pin and retaining nut.
Pull the rotor off the spindle to release the inner bearing.
Clean all surfaces before you install the new bearings.
Note: Always check the orientation of the magnetic encoder if your car has ABS. If you damage it or install it incorrectly, your ABS might not work.
Pack Bearings with Grease
Packing the bearings with grease is a key step. You want to make sure every part is coated for smooth operation. Use a bearing pack tool or a grease gun for best results. If you’re working on trailer bearings, try using a plastic bag to keep things tidy.
Here’s a quick look at the types of grease you might use:
Type of Grease | Description | Suitable Applications |
General Multi-Purpose Grease | Made with calcium sulfonate, resists water but not high heat. | Drum brake wheel bearings, chassis components |
High Temperature Multi-Purpose Grease | Silicone-based, stable under high temperatures. | High temp applications, general use |
Moly-Grease | Contains molybdenum for higher-pressure protection. | Specific vehicle requirements (e.g., Ford) |
Marine Grease | Loaded with water resistance additives. | Boats, boat trailers, water-exposed vehicles |
Tip: Use REM-polished Timken bearings and an ultra-low drag inner hub seal for top performance.
Install the New Wheel Bearings
You’re almost done! To install the new wheel bearings, inspect the axle tube and make sure it’s clean. Put in the new bearing cup. Pre-lubricate the thrust face outer edge with grease. Pack each bearing with your bearing pack tool. Place the bearing into the hub and install the grease slinger if your car uses one.
Keep these safety tips in mind:
Always use a torque wrench to tighten bolts to the manufacturer’s specifications.
Don’t reuse torque-to-yield fasteners. Replace them if needed.
Apply thread-locking compound to certain fasteners after removal.
If you tighten lug nuts too much, you risk overheating the bearings. If you leave them too loose, the wheel could wobble or even fall off. Correct torque settings help prevent excessive wear and keep your car safe.
Secure with Cotter Pin
The final step is to secure everything with a new cotter pin. Never reuse an old cotter pin. Once bent, it becomes brittle and can fail. A new cotter pin locks the castle nut in place and keeps your wheel bearing secure.
Cotter pins provide a reliable locking mechanism. If you reuse an old one, you increase the risk of failure. Always use a fresh cotter pin for safety.
Check that the washer is secure. If it spins, it could shear the cotter pin and let the castle nut back off. This can cause major problems while driving.
Safety Reminder: Never work under your vehicle without proper support. Always use jack stands and double-check that your car is stable before you start.
Replacing a wheel bearing takes time. For beginners, expect to spend 30 minutes to 1.5 hours on a front wheel bearing and 15 to 45 minutes on a rear one. Take your time and follow each step carefully.
You’ve learned how to replace a wheel bearing safely. Before you start, check this quick list:
Gather your tools and set up a safe workspace.
Lift your car with a jack and secure it.
Remove the wheel and keep the lug nuts safe.
Use high-quality parts.
Read your service manual.
Stay safe by using the right tools and testing your work. If you feel unsure, reach out to a professional or follow manufacturer instructions. Wheel bearings usually last 75,000 to 100,000 miles, so regular checks help keep your ride smooth. ��
FAQ
How do you know if your wheel bearing is bad?
You might hear grinding or humming noises. Your steering could feel loose. Sometimes, your tires wear unevenly. If you notice these signs, check your bearings.
Can you drive with a bad wheel bearing?
You shouldn’t drive with a bad wheel bearing. It can cause your wheel to come off. You risk losing control. Get it fixed as soon as possible.
Do you need special tools to replace wheel bearings?
You need a jack, wrenches, and a bearing puller. Some cars need extra tools. Always check your owner’s manual before you start. Using the right tools makes the job easier.

 English
 العربية
 Français
 Русский
 Español
 Português
 Deutsch
 italiano
 日本語
日本語 한국어
한국어 Nederlands
 Tiếng Việt
 ไทย
ไทย Polski
 Türkçe
 ພາສາລາວ
 ភាសាខ្មែរ
 Bahasa Melayu
 ဗမာစာ
ဗမာစာ தமிழ்
தமிழ் Filipino
 Bahasa Indonesia
 magyar
 Română
 Čeština
 Монгол
 қазақ
қазақ Српски
 हिन्दी
 فارسی
فارسی Kiswahili
 Slovenčina
 Slovenščina
 Norsk
Norsk Svenska
 українська
 Ελληνικά
 Suomi
Suomi Հայերեն
 עברית
עברית Latine
 Dansk
Dansk اردو
اردو Shqip
Shqip বাংলা
বাংলা Hrvatski
 Afrikaans
 Gaeilge
 Oʻzbekcha
 Български
 ქართული